Difference between revisions of "Tutorial for adding characters"
(Created page with "'''Eskarn's tutorial for adding characters''' First off this is really easy to do once you know how. What you will need is . '''Maya (im using 2014)''' '''XStoryPlayer 3.5...") |
|||
| Line 8: | Line 8: | ||
'''XStoryPlayer 3.5''' | '''XStoryPlayer 3.5''' | ||
| + | |||
| + | '''Always make sure you have the latest patch''' | ||
'''Download the''' '[[Tutorial resource pack]]' '''using the account manager.''' | '''Download the''' '[[Tutorial resource pack]]' '''using the account manager.''' | ||
Revision as of 01:00, 21 November 2015
Eskarn's tutorial for adding characters
First off this is really easy to do once you know how.
What you will need is .
Maya (im using 2014)
XStoryPlayer 3.5
Always make sure you have the latest patch
Download the 'Tutorial resource pack' using the account manager.
(optional your own character)
If using your own character then adapt this to your needs.
Important notes
For your own character all the internals need to be apart of the model look inside this test model for a reference
The textures used MUST be stated in the body ini and every textures in the ini MUST be used or you will get
Cannot convert Maya file '../pack/pack_character/sources/scenes/char_new/body.ma' : characterShape Char.rd.render.elem[0].lod[0] og count mismatch, in file
render_skin
  {
    elem[0]
    {
      alpha_depth_write = false;

      lod[0]
      {
        mesh = "bodyShape";

        og[0]
        {
          shader = "AA_body";
        }

         og[1]
        {
          shader = "AA_face";
        }

        og[2]
        {
          shader = "AA_eyelid";
        }

        og[3]
        {
          shader = "AA_genitals";
        }

      }
The bone Coll's are used for ground and other solid object collisions.
The skin colisions are what interacts with fluids. The skin colisions are very expensive this is why we can only have a few charaters in the game if you want to have prop charaters that the player does not interact with then do not use skin coliders.
I STILL NEED TO FIGURE OUT HOW TO DO THE SKIN COLLISIONS THIS WILL BE UPDATED WHEN I DO
You will have to adjust the bone weights for it to look proper and no the bone colls do not influence skin weights they are just there to add a skin collider.
Iv never touched Maya's rigging, boning or skinning system so up to you to find the tutorial on how to do that if you dont know.
There is a way to export the current weights off a model and import them to the bodymesh but i doubt the bones will be the same as this rig but if you want to do it look at this tutorial.
We are going to be using.
TutorialResourcePack > 3. Advanced Modding > 1.Creating character > 2.Deriving new character from template character > pack_character
So place pack_character inside your pack folder and go to pack_character\sources\scenes
Then make a folder called "char_new"
Next copy the body.ma from char_new Step 1 into "char_new" Also copy the body.ini you downloaded from dropbox into the "char_new" folder Then for the textures go to pack_character\sources\scenes\textures
Rename the "model" folder to "char_new"
Also go to 1.Installing template character > pack_character > sources > scenes > textures > char_template and copy eye_shine.png to the "char_new" texture folder
Then open body.ma in "char_new"
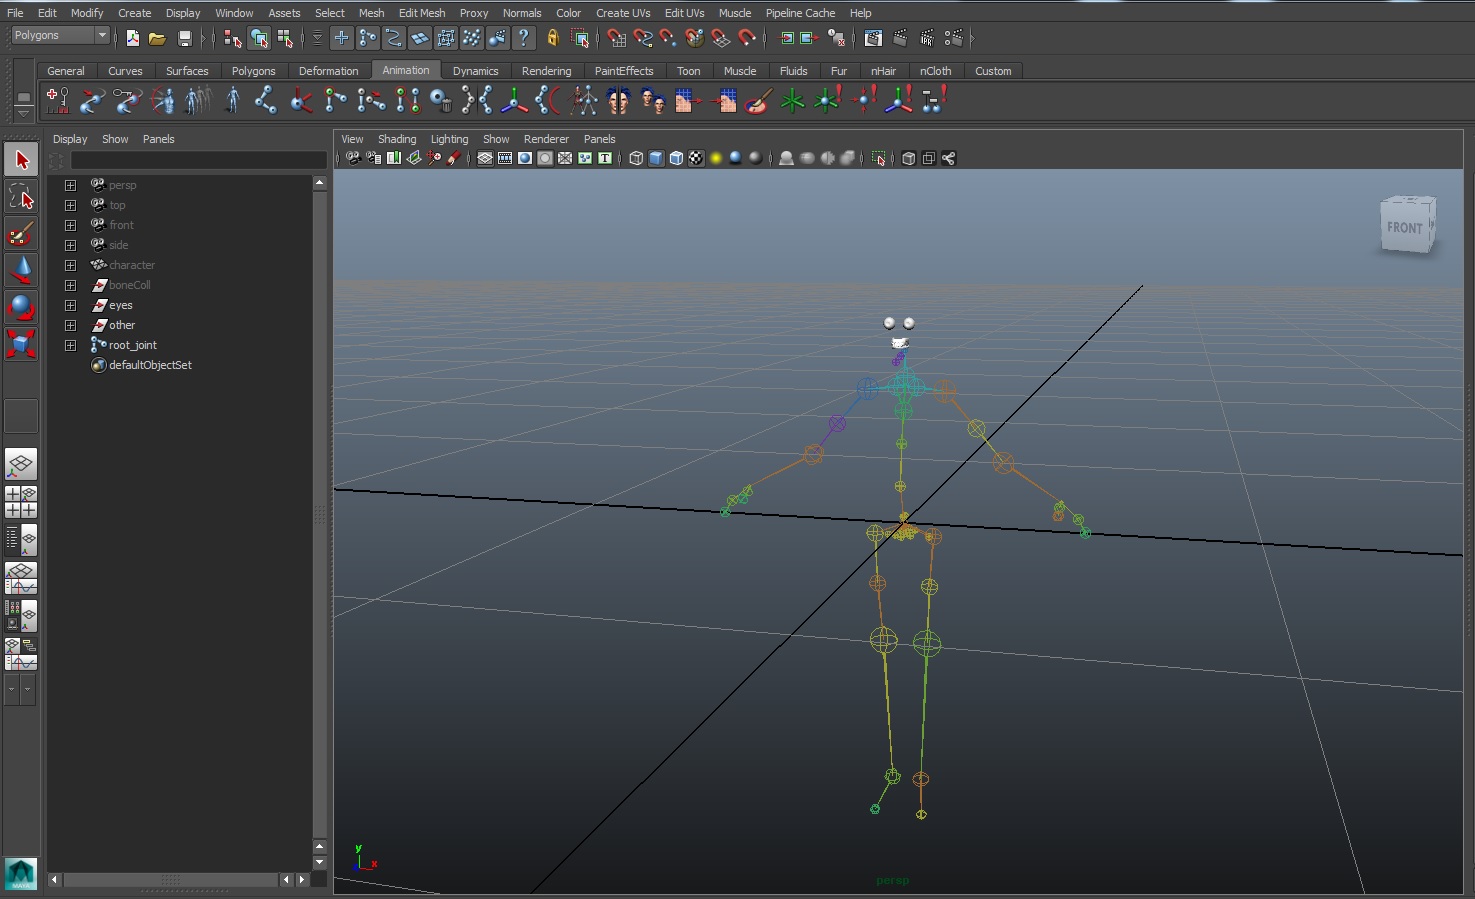
You got a pretty rig with teeth and eyes.
Next is to get the character in.
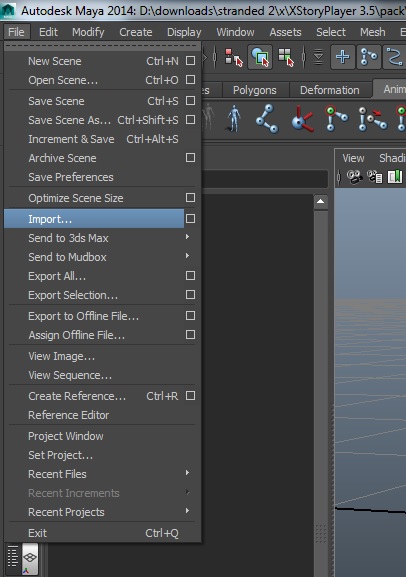
file > import
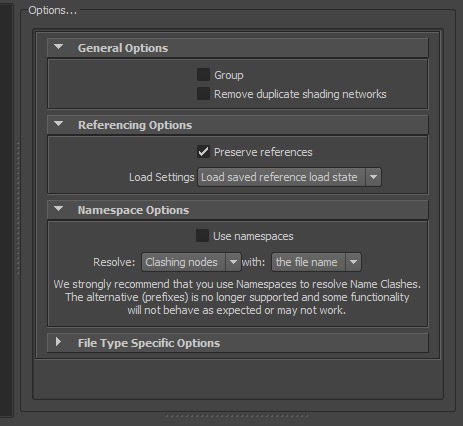
Under namespace options untick use namespaces and change resolve to clashing nodes.
Then import.
pack_character\sources\scenes\model\body.ma
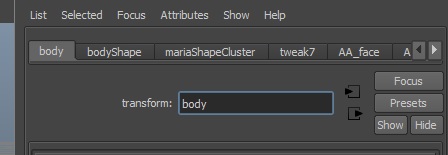
Rename body2 to body
We now need to change a few textures
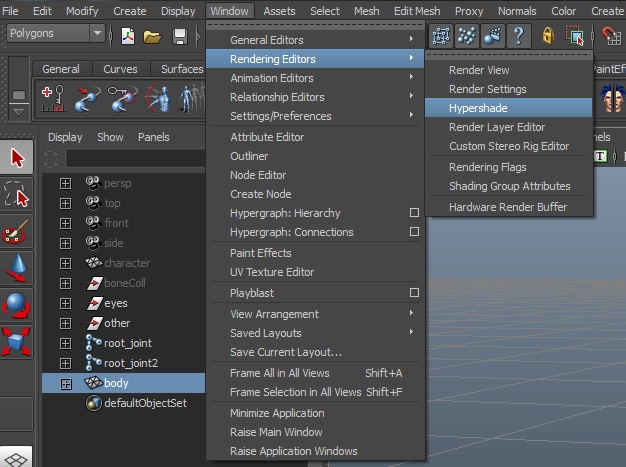
Window > Rendering Editors > Hypershade
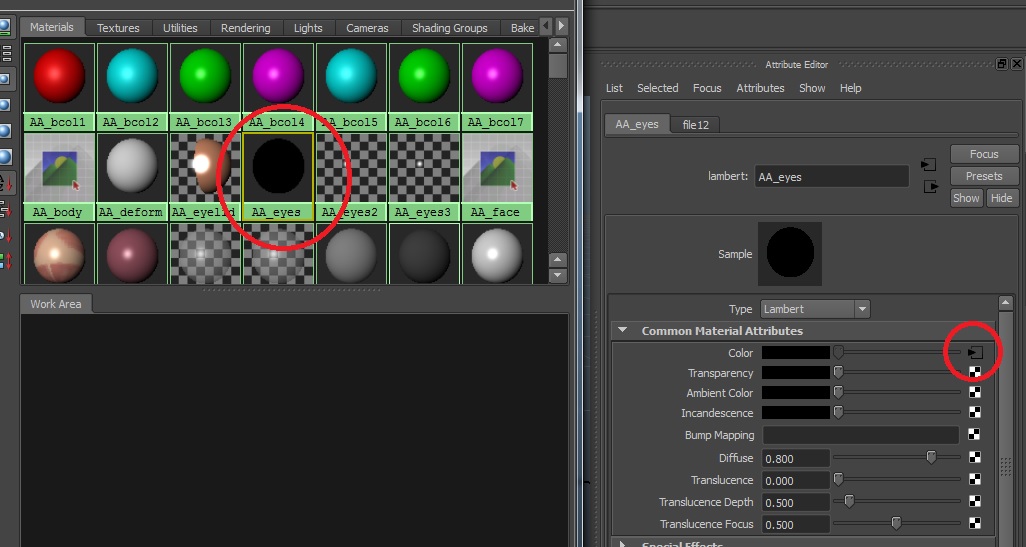
Find AA_eyes and click the arrow in the box on color
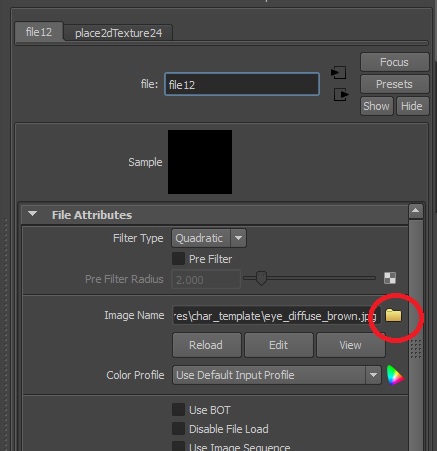
Then change the texture to eye_diffuse_blue.jpg in the char_new texture folder.
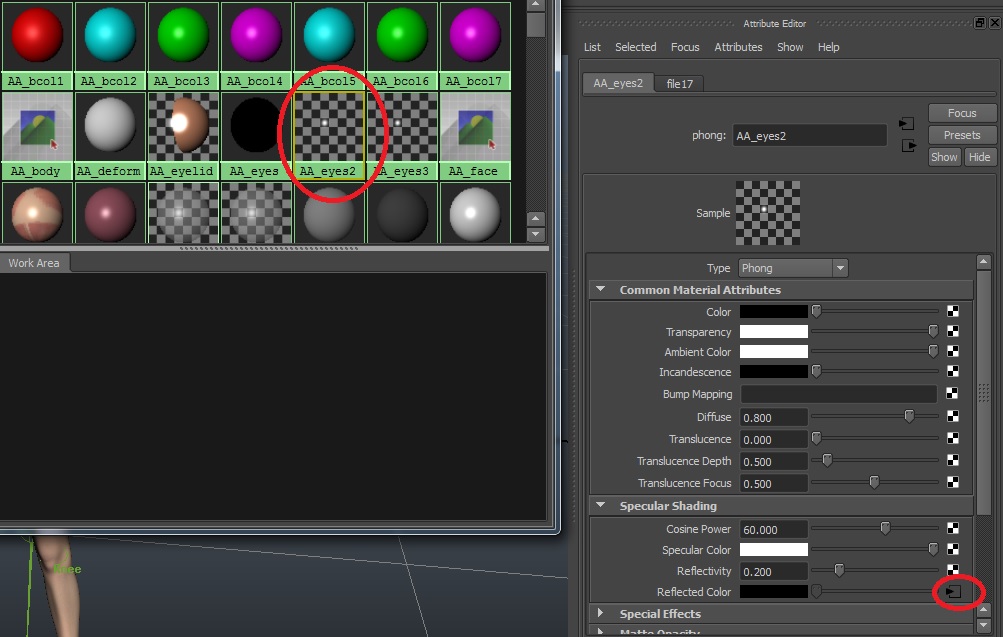
AA_eyes2 change the reflected colour to the eye_shine.jpg in our char_new texture folder
Now we can rotate/move the joints so the new model has correct joints. Make sure you do not translate the joints when they can be rotated. Rotate the joints instead. Or use the joint orient to rotate them (if the rotation is locked). Only translate them to make the joints longer. Use 'X-Ray Joints' to view them better through the body. Use different views (top,front,side) to get a good view of the joint positions.
Use the original model joint hierarchy for reference on where to position the joints. Do not rotate or move the root_joint! Move the body instead.
After you have the bones in the right spot.
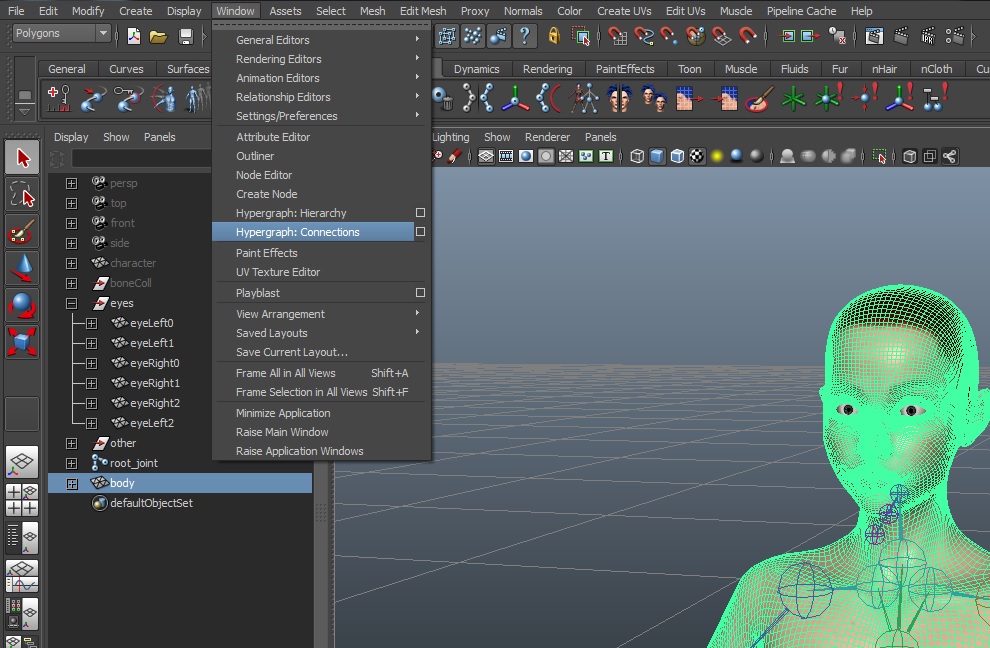
You want to do is delete mariashapecluster. The pre exsisting rig and skin. Select the modelWindow > Hypergraph : Connections
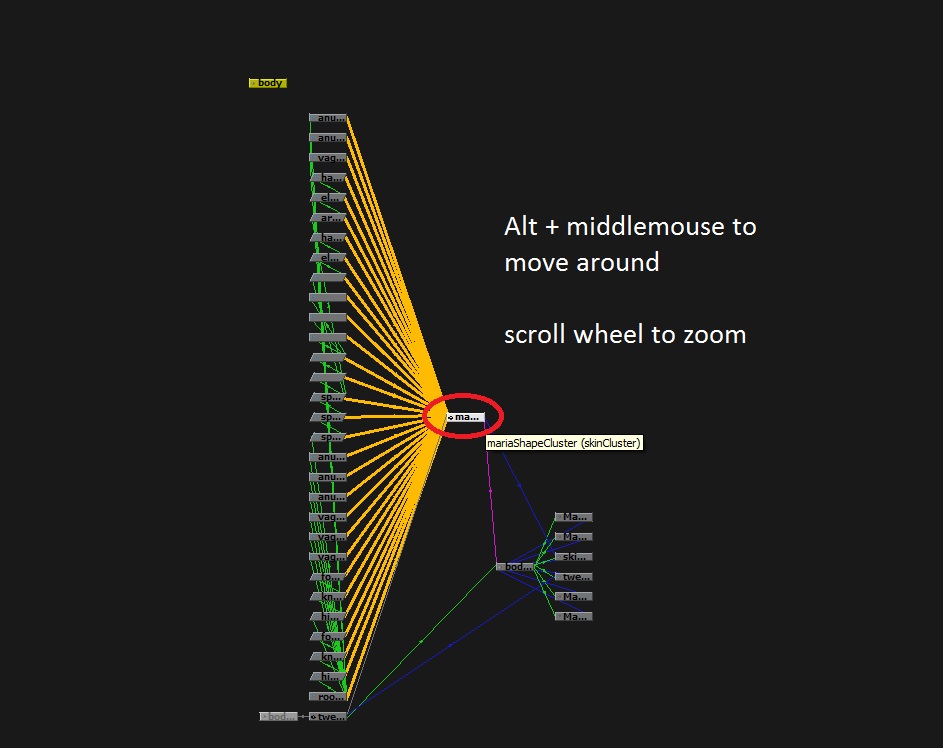 Find the mariashapecluster and delete it and exit the Hypergraph
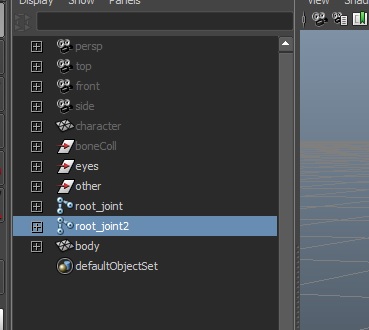
Then delete root_joint2.
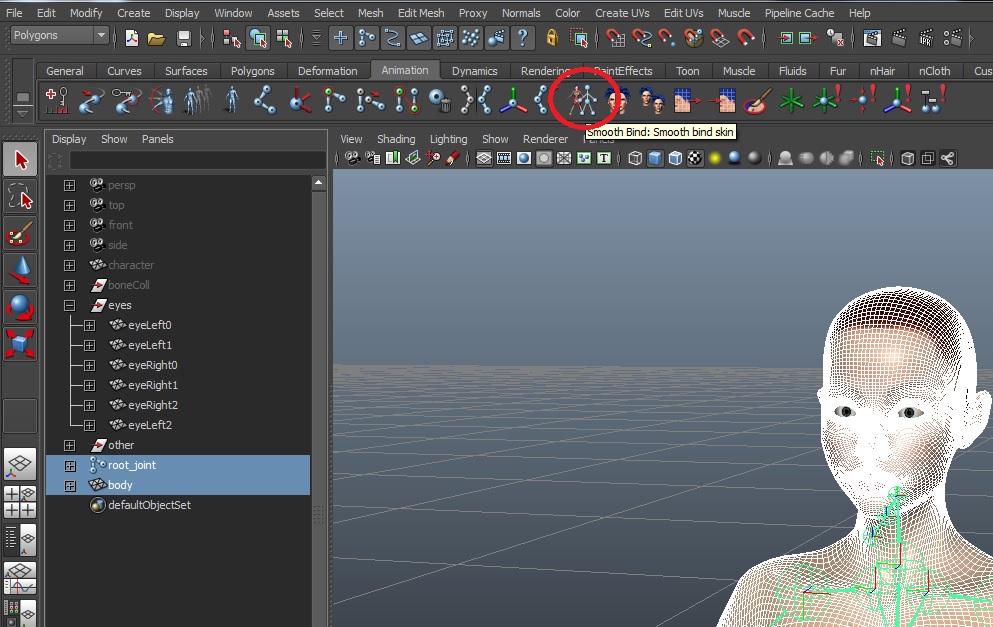
Now bind the model body mesh to the root_joint hierarchy.
Select the mesh and the root_joint and go soft bind.
Once this is done the model should have a new skincluster.
Rotate the joints to check that the body is binded.
Position the eyes. They are constrained, so the way to move them is by adjusting the pivot. Press [INSERT] (go into pivot mode) and then move them (using translate tool). All constrained objects like the eyes and the bone colliders can be moved this way. Also adjust the teeth. They are not constrained so you can use the translation tool directly to move them.
After all this is done we can test to see if the model works.
Grab the filemaker's start ini from char_new Step 7 and drop it in your filemaker folder in the root directory. XStoryPlayer 3.5\filemaker
Best to make a backup of your current one.
Run the filemaker and it should compile all the textures and be happy.
Now we need to see if it worked ingame.
Go back to 1.Installing template character and copy the testini to the root folder.
Then open the settings.ini. (backup the settings.ini if you want)
And add/replace the following.
runtime
{
  start_mode   = TEST;

  debug_sys    = BASIC;
  debug_render = NONE;
  debug_phys   = NONE;
  debug_brain  = ENABLED;

  // Use this directory as second pack directory
  // (The pack_test.bin is used as primary pack)
  pack2        = "pack/pack_character";

  save_key     = "";
}

// Run this file in test mode
#define VIDEO_PATH "video"
#define FAST_NAME "master"
#define TEST_RUN "run_char.ini"
After that has been done go into the testini folder and open up run_char.ini. Then change name_obj = "scenes/char_template"; to be name_obj = "scenes/char_new";
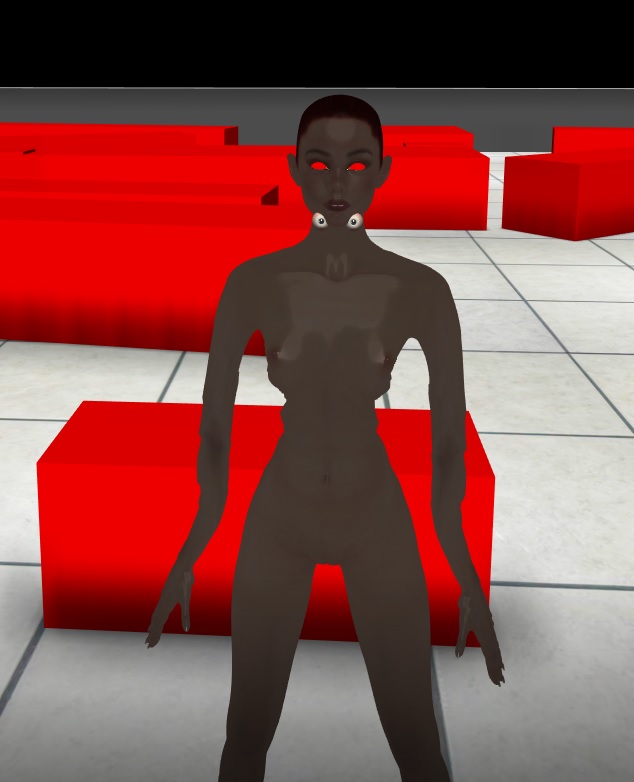
Then run XStoryPlayer.exe and you should have your character standing in front of you for better or worse
There ya have it I'm using the step 7 body.ma because i don't want to have to adjust the skin weights so yours may look a bit wrong but that's the basics of adding a character
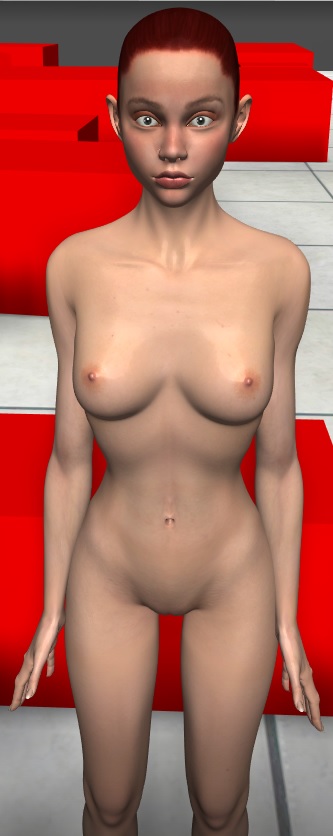
below is what the skin will look like without the skin collision (Ignore the bad model part)
The model will look dark until there is a skin collision mesh but for now you can change the ambient color on both the AA_face and AA_body textures in maya to 0.5 or gray
