Making new scene
From XStoryPlayer Wiki
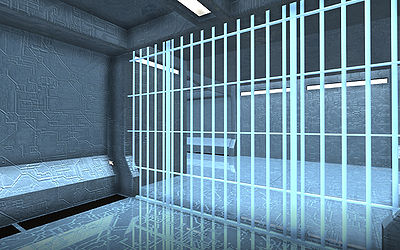
In this tutorial we be creating a new scene that is the interior of a spaceship in which you are held captive.
It is assume you have Maya. If not, you can follow this tutorial but cannot edit the scene in Maya.
Scenes from Maya are converted to in-game format using the filemaker. We will replace the test scene with the spaceship scene.
Steps
- Get the
sourcesdirectory from the 'Tutorial Resource Pack' and place it in the./pack/pack_abducteddirectory.
The sources pack contains the Maya scene with the spaceship interior. It is a relative simple scene sufficient for our short story. - Open the
./pack/pack_abducted/sources/scenes/spaceship/scene.maIn Maya. Also open the./pack/pack_abducted/sources/scenes/spaceship/scene.inifile in a text editor.
Every .ma scene need to be accompanied by an .ini file. This .ini file describes how the objects in the maya scene are being used in XStoryPlayer.
You see that objects from the Maya scene are described in the ini file. - Before diving into the details of the Maya scene and the ini file first lets convert the scene.
Open thestart.inifrom thefilemakerdirectory (make backup) and replace the code as follows:////////////////////////////////////////////////////// // Defines ////////////////////////////////////////////////////// #define SOURCES "../pack/pack_abducted/sources/" #define RUNTIME "../pack/pack_abducted/" ////////////////////////////////////////////////////// // Convert settings ////////////////////////////////////////////////////// // Copy textures to runtime directory and create directory if it not exists maya_auto_copy = COPY_DIR; // Use compressed color textures maya_auto_compress = COLOR; ////////////////////////////////////////////////////// // Convert maya scene ////////////////////////////////////////////////////// Maya scene { src_path = "[SOURCES]"; run_path = "[RUNTIME]"; in_file = "[SOURCES]scenes/spaceship/scene.ma"; } ////////////////////////////////////////////////////// // Compress textures ////////////////////////////////////////////////////// Compgen compress0 { // Comment if you don't want to compress files everytime again compress = true; }
- The
start.iniscript contains all the code needed to convert the maya scene from thesourcesdirectory to the XStoryPlayer game format.
Make sure you have latest Beta-Patch installed (re-download and install just in case) and run the filemaker.
If all went well, you should see a log that shows that the scene has been converted and the textures have been compressed. Also check thefm_log.txtandfm_trace.txtin thefilemakerdirectory if you like. - You should see that several files have been created in the
./pack/pack_abducted/scenes/spaceshipdirectory. Also several (compressed) textures have been added to the./pack/pack_abducted/scenes/texturesdirectory (metal, scifi).
We want to replace the test scene with the spaceship scene. Do this by editing the/init/story/scenes.datfile like this:scene SPACESHIP1 { data { file_name = "scenes/spaceship/scene.scn"; // <-- Change to this name = "The prison"; closed0 = 0; closed1 = 0; closed_text = ""; light_ambient = (1,1,1,1); locked = false; waypoint_def = "waypoint"; } }
Now the spaceship scene is used instead of the test scene.
- Start the Abducted story in XStoryPlayer. You should now be in spaceship cell.
The scene does not have collider objects, we will add these in the next tutorial 'Editing scene'.
