Deriving new character from template character
In this tutorial we will be replacing the character template parts with a new character.
After this tutorial you will know how to create a new character for XStoryPlayer
We assume that you have finished the 'Installing template character' tutorial successfully.
- So you have the pack_character pack installed.
- You have the testing shortcut, for testing the character.
- Also your Maya project path is set to the pack_character/sources
IMPORTANT NOTES:
- Make sure you have downloaded latest Beta-patch (redownload just in case) !
- Make sure you have downloaded latest 'Tutorial resource pack' !
- Make backup of your sources before installing patch and/or packs (just in case) !
- If you have successfully finished or have issues with this tutorial let me know at admin(AT)xmoonproductions(DOT)com, so we know people find this tutorial usefull !
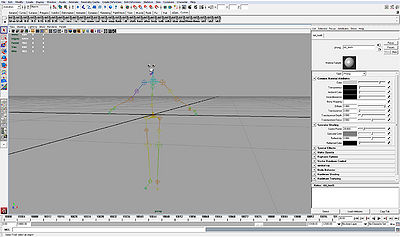
- Open the
./pack/pack_character/sources/scenes/char_template/body.mafile in Maya.
Cleanup the scene. Remove the body, the hair, the body collider until only the character, the skeleton (with bone colliders), the particles, the eyes and the teeth are left.
Also remove the shaders that are not used.
Save the new scene to./pack/pack_character/sources/scenes/char_new/body.ma.
Your end result should look like thechar_new Step 1/body.mafile.
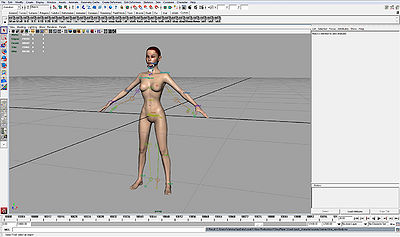
- Now copy the
model/body.mafrom the 'Tutorial resource pack' to thesources/scenesdirectory.
Also copy thetextures/modelfiles from the 'Tutorial resource pack' to thesources/scenes/textures/char_newdirectory.
Import themodel/body.mafrom the 'Tutorial resource pack' into your scene. This is the new (rigged) model you will use to replace the template character.
Save the new scene again. (./pack/pack_character/sources/scenes/char_new/body.ma).
Your end result should look like thechar_new Step 2/body.mafile.
- Copy the
char_new Step 2/body.iniinto yourchar_newdirectory.
This is the template ini file, but most elements are commented out so they do not have to created at first in our scene.
Make a duplicate of the model body (that is not rigged). Name itbody. Make sure itsbodyShapeOrigis deleted (see image).
Hide the rigged model body and its skeleton.
Your end result should look like theStep 3 Char_new/body.mafile.
- Now we can rotate/move the joints so the new model has correct joints.
Make sure you do not translate the joints when they can be rotated. Rotate the joints instead. Or use the joint orient to rotate them (if the rotation is locked).
Only translate them to make the joints longer.
Use 'X-Ray Joints' to view them better through the body. Use different views (top,front,side) to get a good view of the joint positions.
Use the original model joint hierarchy for reference on where to position the joints.
Do not rotate or move the root_joint! Move the body instead.
Adjust the joints and make the end result look like thechar_new Step 4/body.mafile.
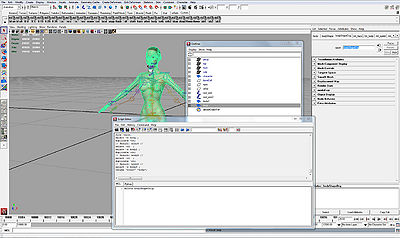
- Now bind the model body mesh to the root_joint hierarchy. Rotate the joints to check that the body is binded.
We have to fix the skinning by mapping the old model rig onto the new one. Luckily we can use the Filemaker for that.
Run thechar_new Step 5/filemaker/start.iniusing the Filemaker, it will map the weights onto the new model.
After running anexport.txtfile is created. Open thebody.mafile in an text editor and replace the weights of the body with the exported weights.
To find where the weights in thebody.mafile are located, search for the skin cluster of the bodyShape e.g.skinCluster1.
A good text editor for editing large files is: TextPad.
Reopen thebody.mafile in Maya. The weights should now be correct.
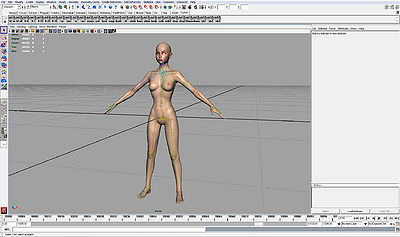
You can now delete the model body and its joints.
The end result look like thechar_new Step 5/body.mafile. - Position the eyes. They are constrained, so the way to move them is by adjusting the pivot. Press [INSERT] (go into pivot mode) and then move them (using translate tool).
All constrained objects like the eyes and the bone colliders can be moved this way.
Also adjust the teeth. They are not constrained so you can use the translation tool directly to move them.
The end result look like thechar_new Step 6/body.mafile. - Now use the Filemaker to create the character. This will create the
characterShape.objfile.
When created successfully we can test the character in test mode (See previous tutorial).
Set thename_objin the./testini/run_char.inifile to"scenes/char_new".
Make sure you have copied thepack_character/scenes/capture/char_newfrom the 'Tutorial resource pack' beforehand.

- In the next tutorial we will add the collider and the hair and animations to the character.


