Difference between revisions of "Installing template character"
From XStoryPlayer Wiki
| Line 62: | Line 62: | ||
Also checkout the <code>body.ini</code> file to take a look at the settings used for the character. There are a lot of settings, and we will cover most of them in the following tutorials.<br> | Also checkout the <code>body.ini</code> file to take a look at the settings used for the character. There are a lot of settings, and we will cover most of them in the following tutorials.<br> | ||
[[file:template_character1.jpg|600px]]</li> | [[file:template_character1.jpg|600px]]</li> | ||
| − | <li>It maybe seemed like a lot of work installing and testing the [[template character]]. But now that all files are in place the work-flow for editing and testing is very easy.<br>Because we will be deriving a new model from the [[template character]] in the next tutorials, we will be slowly changing parts of the [[template character]] until we have completed the new character.<br>In order to test every step along the way it is important that you have a good comprehension of this tutorial.</li> | + | <li>It maybe seemed like a quite lot of work installing and testing the [[template character]]. But now that all files are in place the work-flow for editing and testing is very easy.<br>Because we will be deriving a new model from the [[template character]] in the next tutorials, we will be slowly changing parts of the [[template character]] until we have completed the new character.<br>In order to test every step along the way it is important that you have a good comprehension of this tutorial.</li> |
</ol> | </ol> | ||
Revision as of 15:31, 25 January 2015
In this tutorial you will learn how to load and create the 'Template character'.
Steps
- Re-download the 'Beta patch' using the Account manager and re-install it. Do this even if the version is the same.
(If you already have downloaded the 'Beta patch', delete it first in order to re-download it) - Download the latest version of the 'Tutorial resource pack'. In the
'3. Advanced Modding / 1. Creating character'directory you will see the following files:-
pack_character: This directory contains the 'Template character'. -
testini: This directory contains the files that you can use for the Test mode.
-
- Copy the
pack_characterdirectory to your./packdirectory. - Use the Filemaker to convert the 'Template character' to the game .obj files. Use e.g. this
start.inisample script:#define SOURCES "../pack/pack_character/sources/" #define RUNTIME "../pack/pack_character/" maya_auto_copy = COPY_DIR; maya_auto_compress = COLOR; Maya scene { src_path = "[SOURCES]"; run_path = "[RUNTIME]"; in_file = "[SOURCES]scenes/char_template/body.ma"; } Compgen compress0 {compress = true;}
- If the conversion went well you should see the a
characterShape.objin the./pack/pack_character/scenes/char_templatedirectory.
Also the textures should be compressed an added to the./pack/pack_character/scenes/texturesdirectory. - To test the converted 'Template character' use the following settings in the
settings.inifile.runtime { start_mode = TEST; debug_sys = BASIC; debug_render = NONE; debug_phys = NONE; debug_brain = ENABLED; // Use this directory as second pack directory // (The pack_test.bin is used as primary pack) pack2 = "pack/pack_character"; save_key = ""; } // Run this file in test mode #define TEST_RUN "run_char.ini"
Best is to create a new
'settings_char.ini'and create a newXStoryPlayer64.exeshortcut with-settings "settings_char.ini"as startup parameter.
Also see Creating_cloth point 5. on how to do this. - Copy the
testinifiles from the 'Tutorial resource pack' to your./testinidirectory. Because we use#define TEST_RUN "run_char.ini"the correct script'run_char.ini'is used when running in test mode. - Take a look at the
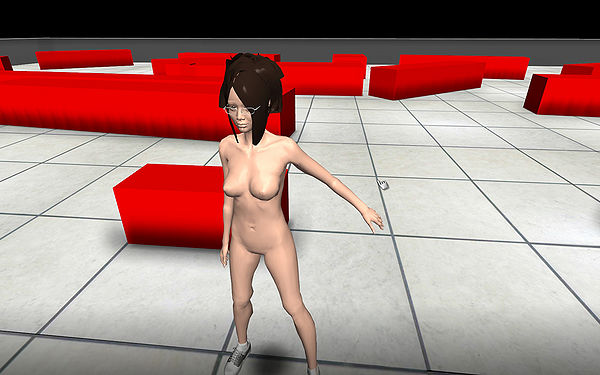
./testini/run_char.inifile. It usesmode = CHARso we can test the character. When we used it for cloth state creation, it was set toCLOTH. As you will see in later tutorials it can also be set toBVH, in order to create/convert animations files. - Now start XStoryPlayer using your shortcut to run in test mode. You should see the template character. You can pull the arms to move it. It uses basic behavior for testing (not a brain).
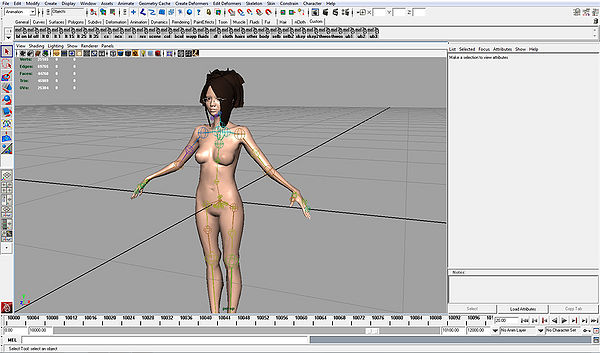
- Start Maya and set your project to the
./pack/pack_characterdirectory. - Now open the
./pack/pack_character/sources/scenes/char_template/body.main Maya. It contains the rigged template character model.
Also checkout thebody.inifile to take a look at the settings used for the character. There are a lot of settings, and we will cover most of them in the following tutorials.
- It maybe seemed like a quite lot of work installing and testing the template character. But now that all files are in place the work-flow for editing and testing is very easy.
Because we will be deriving a new model from the template character in the next tutorials, we will be slowly changing parts of the template character until we have completed the new character.
In order to test every step along the way it is important that you have a good comprehension of this tutorial.

